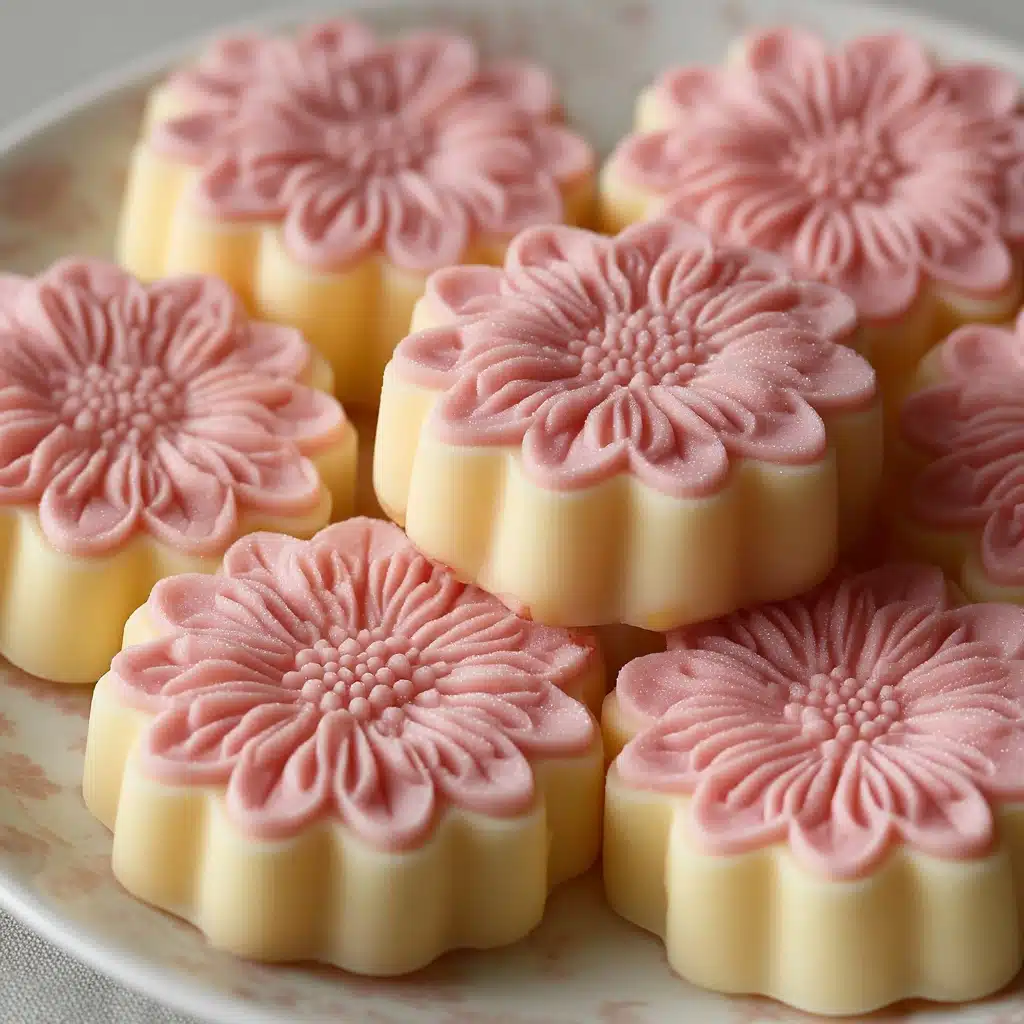
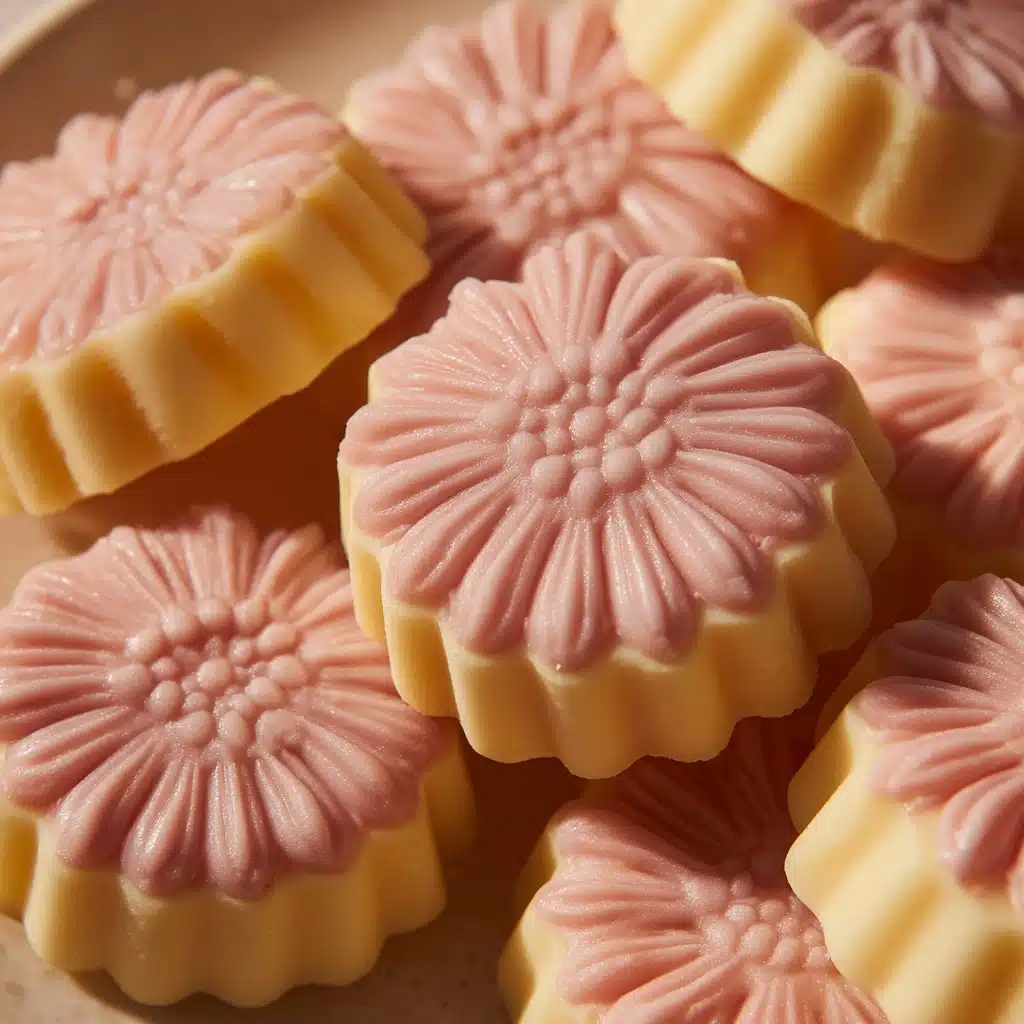
Snow Skin Mooncakes Recipe
Delicate, cool, and delightfully chewy, Snow Skin Mooncakes are a modern twist on a classic that turns any gathering into a celebration. The pillowy-soft, mochi-like “skin” wraps sweet, creamy fillings—everything from fragrant lotus paste to velvety custard—and showcases joyful colors if you opt for natural tints. Whether you’re a Mid-Autumn Festival traditionalist or just love an eye-catching, chilled dessert, Snow Skin Mooncakes promise a delicious adventure with each bite.
Ingredients You’ll Need
You’ll be amazed how a handful of simple ingredients come together to create something so stunning and delicious. Every item on this list plays a crucial role, from the stretchy dough to the flavorful filling—so choose your favorites and let’s get started!
- Glutinous rice flour (100g): This is what gives Snow Skin Mooncakes their signature soft and chewy texture—don’t swap it for regular rice flour!
- Rice flour (100g): Balances the texture, preventing the mooncake skin from becoming too sticky or dense.
- Wheat starch (50g): Adds an extra silky, tender bite and helps the skin look bright and white.
- Powdered sugar (60g): Sweetens the dough delicately, blending smoothly for the perfect bite.
- Milk (250ml): Brings the dough together and gives extra richness—whole milk works beautifully, but alternatives are ok too.
- Sweetened condensed milk (50ml): Gives a creamy sweetness that makes every mouthful luscious and memorable.
- Vegetable oil (30g): Keeps the snow skin tender and prevents drying out in the fridge.
- Food coloring (1–2 drops, optional): Make your mooncakes playful and personalized without changing the flavor—think pink dragonfruit or matcha green!
- Prepared filling (300g): Choose between classics like lotus seed paste, red bean paste, or custard—about 25g per mooncake.
- Extra cooked glutinous rice flour (koh fun) for dusting: Dust your hands and molds to keep everything smooth and prevent sticking (toasted flour for authentic flavor).
How to Make Snow Skin Mooncakes
Step 1: Mix the Dry Ingredients
Start by sifting the glutinous rice flour, rice flour, wheat starch, and powdered sugar into a large mixing bowl. This step ensures your Snow Skin Mooncakes turn out lump-free and beautifully smooth, so don’t rush it—those few seconds of whisking make all the difference.
Step 2: Blend the Wet Ingredients
In a separate bowl, whisk together the milk, sweetened condensed milk, and vegetable oil until the mixture looks creamy and fully combined. This is where that signature velvety texture begins to take shape!
Step 3: Combine for a Smooth Batter
Slowly pour your liquid ingredients into the bowl of dry mix, stirring constantly. You’ll want a thick, glossy batter with no lumps—scrape down the sides and keep mixing until everything is incorporated. If you’re adding food coloring, divide the batter and stir in the color now for a stunning visual effect.
Step 4: Strain and Steam
Next, pour the smooth batter through a fine-mesh strainer directly into a heatproof dish. Steaming gets rid of any tiny lumps and guarantees a more refined snow skin. Cover and steam over high heat for 25 to 30 minutes until the dough is firm and fully set.
Step 5: Cool and Knead
Once it’s done steaming, let the dough cool for about 10 minutes (enough to handle!), then use clean hands to knead until everything is soft, stretchy, and elastic. This step is a true sensory delight—don’t skip it! Cover the dough and pop it into the refrigerator for one hour to chill.
Step 6: Portion the Dough and Filling
Weigh out the chilled dough and divide it into 12 even balls of about 25g each. Do the same for your filling—whether it’s lotus seed paste or custard, aim for even sizes. This keeps every mooncake perfectly balanced with just the right ratio of chewy skin and sweet center.
Step 7: Shape and Fill
Take one piece of dough and flatten it between your palms into a disc. Place a portion of filling in the center, then gently wrap the dough up and around, pinching to seal. Roll into a smooth ball—if it sticks, use a dusting of koh fun.
Step 8: Press into Mooncake Molds
Lightly dust your mooncake mold with koh fun, then pop in the filled dough ball. Press firmly to shape, then carefully unmold onto a tray. Repeat with the remaining dough and filling until you have a collection of pretty little mooncakes.
Step 9: Chill and Enjoy
Let your Snow Skin Mooncakes chill for at least 2 hours before serving. This final step firms up the skin, blends the flavors, and makes every bite wonderfully refreshing—absolutely worth the wait!
How to Serve Snow Skin Mooncakes
Garnishes
Dress up your Snow Skin Mooncakes simply with a sprinkle of toasted sesame seeds, a brush of edible gold dust, or a scattering of crushed pistachios. Fresh fruit slices or a drizzle of sweet syrup instantly add an extra touch of elegance to your mooncake platter.
Side Dishes
Serve these beauties alongside hot jasmine tea, silky soy milk, or a light fruit salad. The cool, chewy mooncakes harmonize with subtle drinks and desserts, elevating the whole tasting experience while keeping things light and celebratory.
Creative Ways to Present
Stack Snow Skin Mooncakes on a tiered cake stand for a dramatic centerpiece, or nestle them in pleated parchment wrappers for a bakery-style look. Arrange different colored mooncakes in a mosaic pattern on a platter, or wrap each in delicate cellophane for gifting—guaranteed smiles all around!
Make Ahead and Storage
Storing Leftovers
Snow Skin Mooncakes are happiest in an airtight container in the fridge, where they’ll stay soft and fresh for up to five days. Separate layers with parchment if you stack them, so nothing sticks or loses its pretty shape.
Freezing
Need to prep ahead? You can freeze fully assembled mooncakes: wrap individually in cling film and pop them in a freezer bag. Just thaw overnight in the fridge before serving for the perfect texture every time.
Reheating
These mooncakes taste best chilled, but if you prefer a softer bite, let them stand at room temperature for 10–15 minutes before serving—no actual reheating needed! That way, the delicate flavors truly shine.
FAQs
Can I use other types of flour if I can’t find glutinous rice flour?
For authentic Snow Skin Mooncakes, glutinous rice flour is essential for the chewy, mochi-like skin. Regular rice flour or all-purpose flour just won’t give you the same soft, springy result, so it’s worth tracking down the real thing!
Why does my mooncake skin look dry or crackly?
If the dough wasn’t kneaded enough, or if it dried out before shaping, the skin can appear crackly. Always knead until smooth and keep it covered while working, and you’ll have that classic, silky mooncake look every time.
Can I make Snow Skin Mooncakes with natural food coloring?
Absolutely! Beet juice, matcha powder, butterfly pea flower, or even freeze-dried fruit dust all make wonderful, natural colorings without altering the flavor. Play with combinations for a truly unique batch.
What fillings work best for Snow Skin Mooncakes?
Traditional lotus seed paste and red bean paste are classic choices, but don’t be afraid to experiment—custard, sesame paste, chocolate, or matcha-flavored fillings are all incredible inside the cool, tender skin.
How do I get perfectly shaped mooncakes every time?
Dust your mooncake mold with plenty of koh fun (toasted glutinous rice flour), and don’t overfill! Press firmly but gently, then unmold slowly. Practice makes perfect, and even “imperfect” mooncakes still taste heavenly.
Final Thoughts
There’s something special about making Snow Skin Mooncakes from scratch—it’s hands-on, creative, and always brings joy to the table. Give it a try, have fun with colors and fillings, and share a plate with someone you love. You’ll never look at mooncakes the same way again!
Print
Snow Skin Mooncakes Recipe
- Total Time: 1 hour (plus chilling time)
- Yield: 12 mooncakes (50g each) 1x
- Diet: Vegetarian
Description
Learn how to make delicious Snow Skin Mooncakes at home with this easy recipe. These no-bake mooncakes feature a soft and slightly chewy snow skin filled with your choice of sweet lotus seed paste, red bean paste, or custard.
Ingredients
Dough:
- 100g glutinous rice flour
- 100g rice flour
- 50g wheat starch
- 60g powdered sugar
- 250ml milk
- 50ml sweetened condensed milk
- 30g vegetable oil
- 1–2 drops food coloring (optional)
Filling:
- 300g prepared filling (lotus seed paste, red bean paste, or custard)
- Extra cooked glutinous rice flour (koh fun) for dusting
Instructions
- Prepare Dough: Combine dry ingredients in a bowl. Whisk milk, condensed milk, and oil in a separate bowl. Mix wet and dry ingredients until smooth.
- Steam Dough: Steam mixture until cooked and firm. Cool, knead, and chill for 1 hour.
- Assemble Mooncakes: Divide dough and filling. Wrap dough around filling, shape into balls, press into molds, and chill for 2 hours.
Notes
- Store mooncakes in the refrigerator for up to 5 days.
- You can make your own glutinous rice flour by toasting it in a dry pan.
- Prep Time: 30 minutes
- Cook Time: 30 minutes
- Category: Dessert
- Method: Steaming
- Cuisine: Chinese
Nutrition
- Serving Size: 1 mooncake
- Calories: 170
- Sugar: 12g
- Sodium: 25mg
- Fat: 5g
- Saturated Fat: 1g
- Unsaturated Fat: 4g
- Trans Fat: 0g
- Carbohydrates: 28g
- Fiber: 1g
- Protein: 2g
- Cholesterol: 5mg