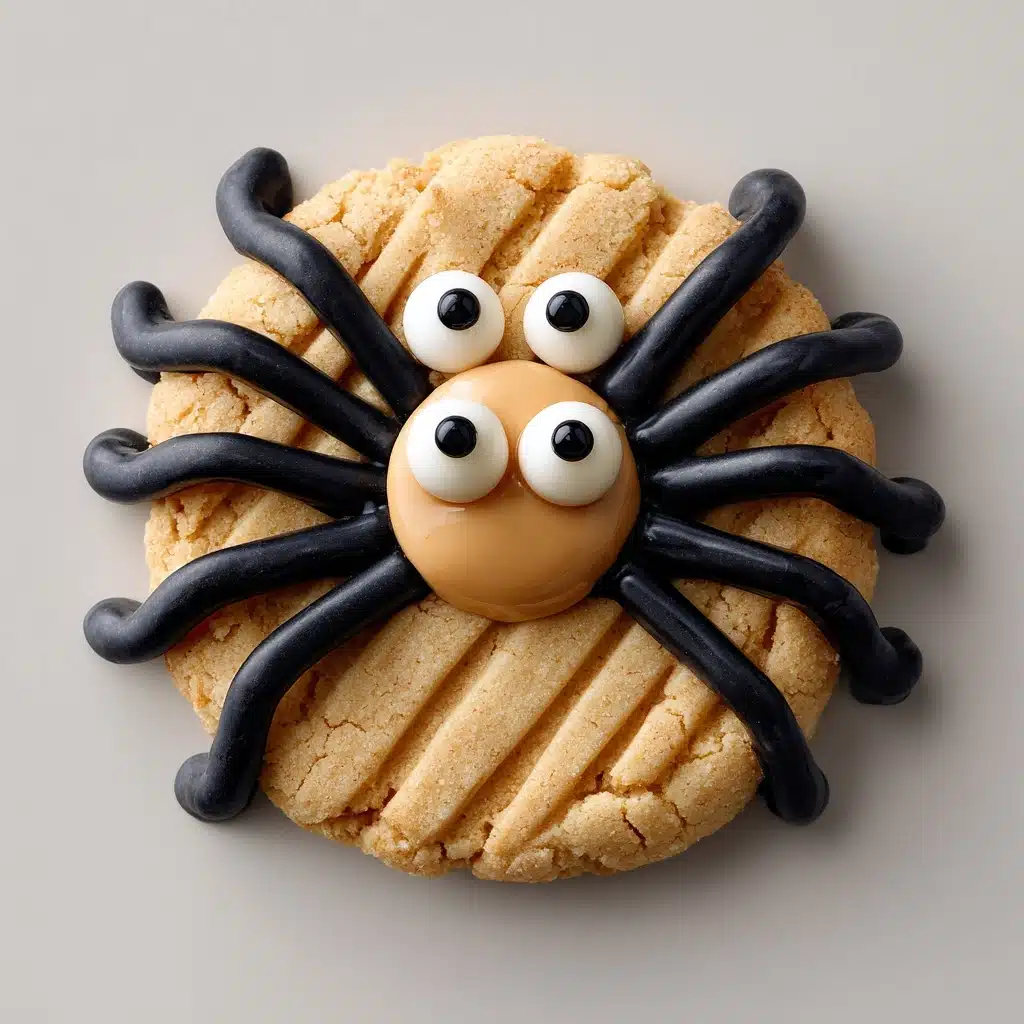
Peanut Butter Spider Cookies Recipe
If you’re searching for a Halloween treat that’s equal parts adorable and irresistible, look no further than Peanut Butter Spider Cookies. This playful cookie recipe captures everything you love about classic peanut butter cookies, then transforms them into spook-tacular spiders with a touch of chocolate and a pair of googly candy eyes. They’re not only the highlight of every holiday sweets table, but also incredibly easy to make—just right for baking with little helpers or whipping up a last-minute batch for a party. Peanut Butter Spider Cookies are truly a must-try for anyone who wants their desserts to stand out and spread joy!
Ingredients You’ll Need
With a handful of simple but powerful ingredients, you’re well on your way to show-stopping cookies. Each one plays a special role in building the rich flavor, perfect texture, and whimsical look of your Peanut Butter Spider Cookies.
- Unsalted Butter (1/2 cup, softened): Adds rich flavor while giving the cookies a soft, tender crumb.
- Creamy Peanut Butter (1/2 cup): Delivers that signature peanutty taste and a moist, chewy texture.
- Granulated Sugar (1/2 cup): Helps create just the right level of sweetness and supports tender cookies.
- Brown Sugar, packed (1/2 cup): Adds a hint of caramel flavor and keeps the cookies extra soft.
- Large Egg (1): Binds the dough together and gives the cookies lift.
- Vanilla Extract (1 tsp): Adds a warm aroma that ties all the flavors together.
- All-Purpose Flour (1 1/2 cups): Creates structure and a classic chewy cookie base.
- Baking Soda (1/2 tsp): Gives the cookies just the right lift and a soft center.
- Salt (1/4 tsp): Balances the sweetness and deepens the nutty flavor.
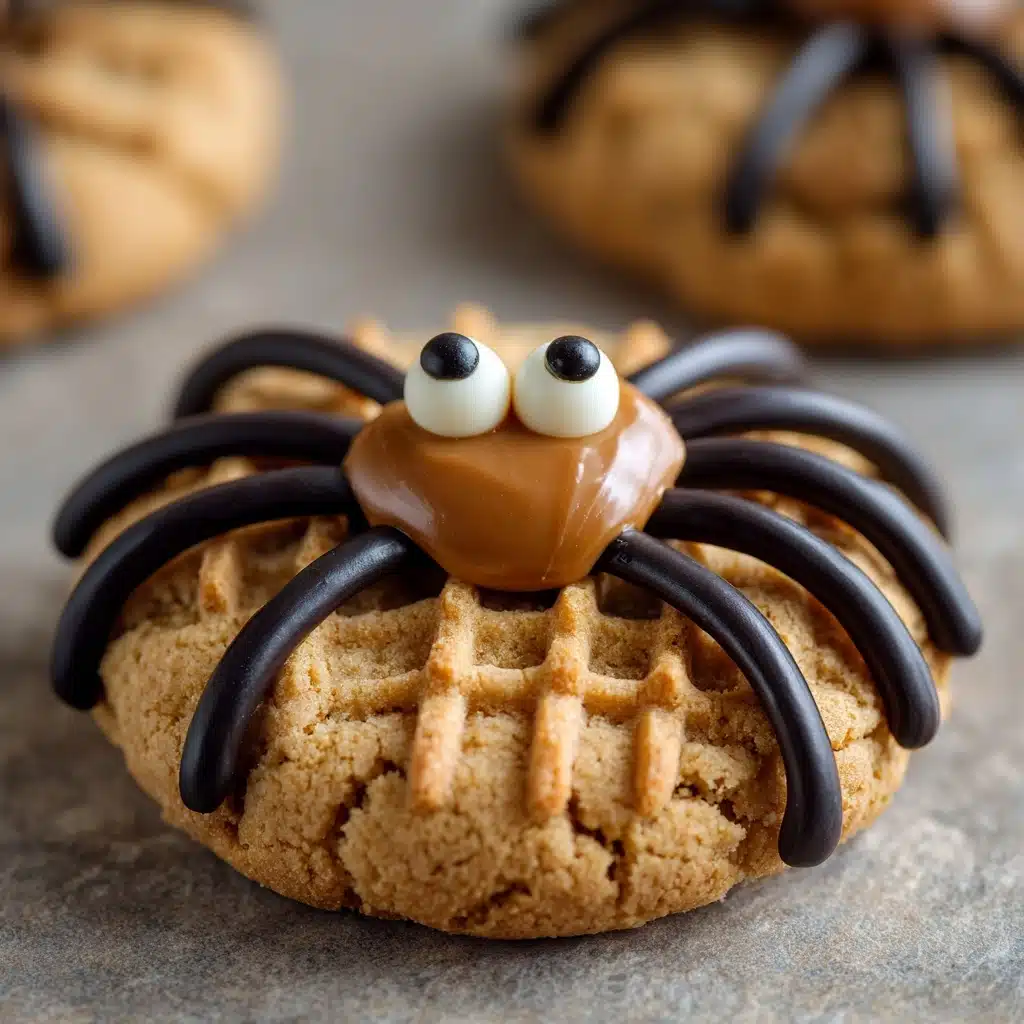
- Mini Peanut Butter Cups (24, unwrapped and chilled): Serve as the spider “body” and bring a fun, chocolatey twist!
- Semisweet Chocolate Chips (1/2 cup, for decorating): Perfect for drawing playful spider legs with smooth, rich chocolate.
- Candy Eyeballs (48): These complete the cookies’ whimsical look and add irresistible personality.
How to Make Peanut Butter Spider Cookies
Step 1: Get Your Oven and Pans Ready
Start by preheating your oven to 350°F (175°C). Line a baking sheet with parchment paper so the cookies won’t stick and cleanup will be a breeze—especially helpful when you’re focused on decorating your batch of Peanut Butter Spider Cookies!
Step 2: Cream the Butters and Sugars
In a large mixing bowl, combine the softened butter, creamy peanut butter, granulated sugar, and brown sugar. Using a hand or stand mixer, beat until the mixture is light, fluffy, and totally blended. This step introduces air for a soft, lovely texture and melds your main flavors together.
Step 3: Add Egg and Vanilla
Beat in the egg and vanilla extract until everything is smooth. This helps hold the dough together while letting the vanilla quietly enhance the peanut butter goodness in every bite.
Step 4: Mix the Dry Ingredients
In a separate bowl, whisk together the flour, baking soda, and salt. Mixing these beforehand ensures the leavening agent and salt get distributed evenly, so your Peanut Butter Spider Cookies bake up perfectly soft and uniform every time.
Step 5: Make the Dough
Gradually add your dry mixture to the wet, mixing gently until a soft dough forms. Don’t over-mix here—just combine until there are no visible streaks of flour. This guarantees the best soft texture.
Step 6: Shape and Bake
Roll the dough into 1-inch balls and space them about 2 inches apart on your prepared baking sheet. Bake for 10–12 minutes, until the edges are lightly golden but the centers still look a tad soft. This is what gives your Peanut Butter Spider Cookies their dreamy softness.
Step 7: Add the Peanut Butter Cups
Immediately after you pull the cookies from the oven, gently press a chilled mini peanut butter cup into the center of each one. The warmth will help it nestle perfectly without melting too much (that’s why chilling is key!). Let them cool on the baking sheet for about 5 minutes before moving to a wire rack.
Step 8: Decorate With Spider Legs and Eyes
Once the cookies are completely cool, melt the chocolate chips and transfer them to a piping or zip-top bag with a tiny corner snipped off. Carefully pipe three little legs on each side of every peanut butter cup to create your spiders. Use another dab of chocolate to attach a pair of candy eyeballs to each “spider” face. Take a moment to admire your adorable, almost too-cute-to-eat Peanut Butter Spider Cookies!
How to Serve Peanut Butter Spider Cookies
Garnishes
For an extra special touch, sprinkle some festive Halloween-colored sprinkles around the plate, or dust the cookies lightly with powdered sugar for a “cobweb” effect. Kids and adults alike will love a few extra candy eyes scattered among your Peanut Butter Spider Cookies, making each one feel extra unique.
Side Dishes
These cookies are fantastic alongside a cold glass of milk or a warm mug of hot cocoa. For parties, add a platter of fresh fruit or a bowl of salty popcorn to balance the sweetness—a perfect Halloween spread that complements the peanut butter flavor beautifully.
Creative Ways to Present
If you’re looking to wow a crowd, arrange your Peanut Butter Spider Cookies on a black or orange platter for ultimate spooky vibes, or use them as cake toppers for a Halloween centerpiece. You can even nestle each cookie in a mini cupcake wrapper for an easy, grab-and-go treat at school parties or office gatherings.
Make Ahead and Storage
Storing Leftovers
Keep your leftover Peanut Butter Spider Cookies fresh by storing them in an airtight container at room temperature. They’ll maintain their soft texture and festive look for up to five days—if they don’t all disappear before then!
Freezing
These cookies are very freezer-friendly. Once decorated and fully cooled, layer them between sheets of parchment or wax paper in a freezer-safe container. They’ll last for up to three months and can be thawed on the counter whenever the craving for Peanut Butter Spider Cookies strikes.
Reheating
If you’d like to enjoy that fresh-from-the-oven warmth, just pop a cookie in the microwave for five to ten seconds. The chocolate will melt slightly, bringing back all those wonderful just-baked aromas to your Peanut Butter Spider Cookies.
FAQs
Can I use chunky peanut butter instead of creamy?
Yes, you can substitute chunky peanut butter if you like a little texture in your cookies. Keep in mind, your Peanut Butter Spider Cookies may have a more rustic appearance, but that signature nutty flavor will still shine through.
Do I have to chill the peanut butter cups before pressing them into the cookies?
Absolutely—it is essential to chill the peanut butter cups beforehand. This prevents them from melting too much when pressed onto the warm cookies and helps keep your spider “bodies” looking neat and adorable.
Can I make the dough ahead of time?
Definitely! You can prepare the dough up to 24 hours in advance. Just cover and refrigerate it until ready to bake, letting it come to room temperature briefly before shaping your Peanut Butter Spider Cookies.
What’s the best way to melt chocolate chips for decorating?
The quickest way is to microwave the chocolate chips in 20-second bursts, stirring after each, until smooth. Alternatively, you can melt them over a double boiler for more control and silky texture, perfect for drawing tiny spider legs.
Are these Peanut Butter Spider Cookies safe for kids with nut allergies?
Unfortunately, because the recipe contains both peanut butter and peanut butter cups, it’s not suitable for those with nut allergies. For a nut-free version, try using a sunflower seed butter and nut-free chocolate candies as substitutes.
Final Thoughts
There’s something so joyful about baking a batch of Peanut Butter Spider Cookies, whether you’re preparing for Halloween or just want to surprise your family with something whimsical. Invite your friends or kids to help—decorating each cookie is as much fun as eating them! I hope you’ll give these a try and let them become a spirited staple in your autumn baking adventures.
Print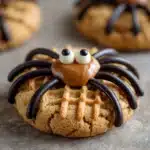
Peanut Butter Spider Cookies Recipe
- Total Time: 45 minutes (including decorating)
- Yield: 24 cookies 1x
- Diet: Vegetarian
Description
These Peanut Butter Spider Cookies are a delightful and spooky treat perfect for Halloween parties or festive baking. Soft peanut butter cookies with a surprise peanut butter cup center, chocolate legs, and candy eyes – a fun and delicious dessert!
Ingredients
Cookies:
- 1/2 cup unsalted butter, softened
- 1/2 cup creamy peanut butter
- 1/2 cup granulated sugar
- 1/2 cup brown sugar, packed
- 1 large egg
- 1 tsp vanilla extract
- 1 1/2 cups all-purpose flour
- 1/2 tsp baking soda
- 1/4 tsp salt
Decoration:
- 24 mini peanut butter cups (unwrapped and chilled)
- 1/2 cup semisweet chocolate chips (for spider legs)
- 48 candy eyeballs
Instructions
- Preheat the oven: Preheat the oven to 350°F (175°C) and line a baking sheet with parchment paper.
- Cream ingredients: In a large mixing bowl, cream together the butter, peanut butter, granulated sugar, and brown sugar until light and fluffy. Beat in the egg and vanilla extract until well combined.
- Mix dry ingredients: In a separate bowl, whisk together the flour, baking soda, and salt. Gradually add the dry ingredients to the wet ingredients and mix until a soft dough forms.
- Form cookies: Roll the dough into 1-inch balls and place on the prepared baking sheet, spacing them about 2 inches apart. Bake for 10–12 minutes, or until the edges are lightly golden.
- Add decorations: Remove from the oven and immediately press a chilled mini peanut butter cup into the center of each cookie. Cool on the baking sheet for 5 minutes, then transfer to a wire rack.
- Create spider legs: Once completely cooled, melt the chocolate chips and transfer to a piping bag or zip-top bag with a tiny corner snipped off. Pipe 3 small legs on each side of the peanut butter cup, then use a dab of melted chocolate to attach the candy eyes.
Notes
- Chill the peanut butter cups beforehand so they don’t melt when pressed into the warm cookies.
- Store in an airtight container at room temperature for up to 5 days.
- Perfect for Halloween parties and spooky-themed bakes!
- Prep Time: 20 minutes
- Cook Time: 12 minutes
- Category: Dessert
- Method: Baking
- Cuisine: American
Nutrition
- Serving Size: 1 cookie
- Calories: 190
- Sugar: 14g
- Sodium: 100mg
- Fat: 11g
- Saturated Fat: 5g
- Unsaturated Fat: 5g
- Trans Fat: 0g
- Carbohydrates: 21g
- Fiber: 1g
- Protein: 3g
- Cholesterol: 20mg