No-Fuss Sticky Buns Recipe
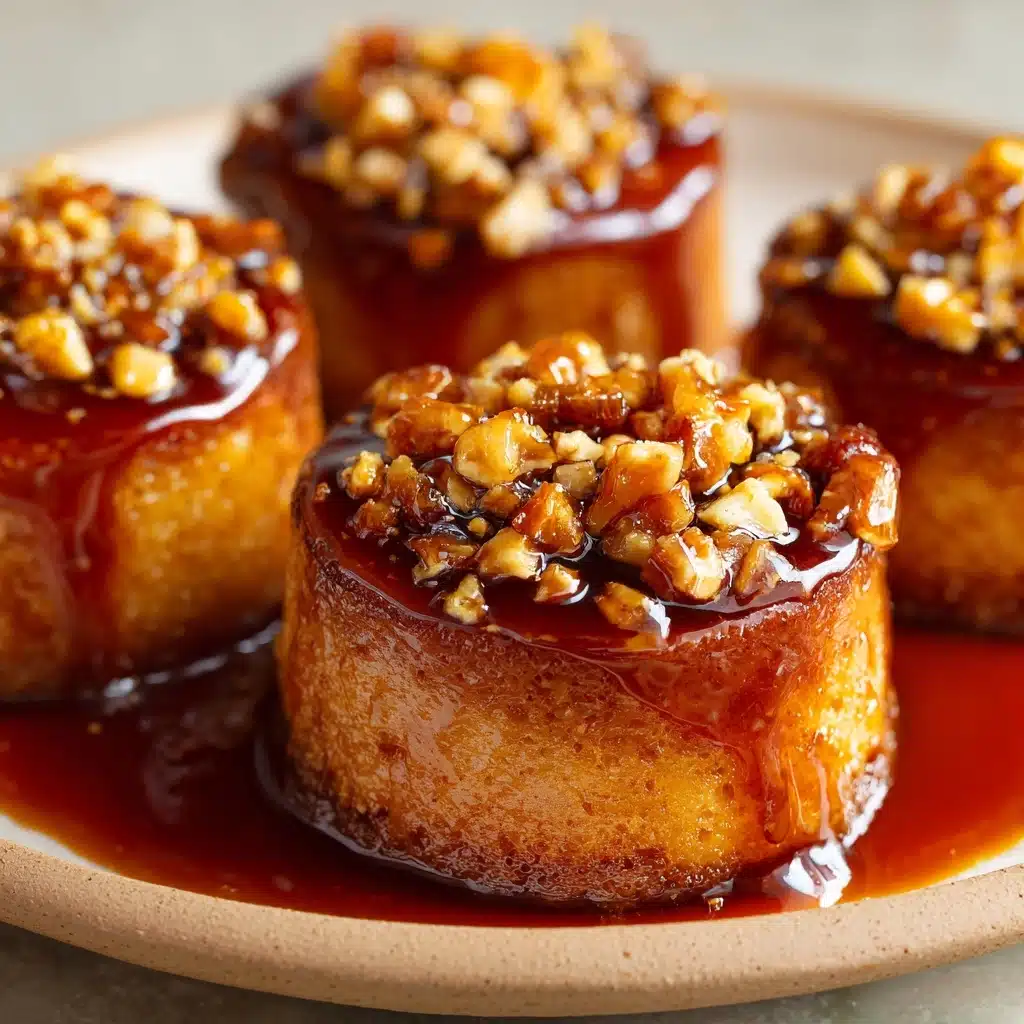
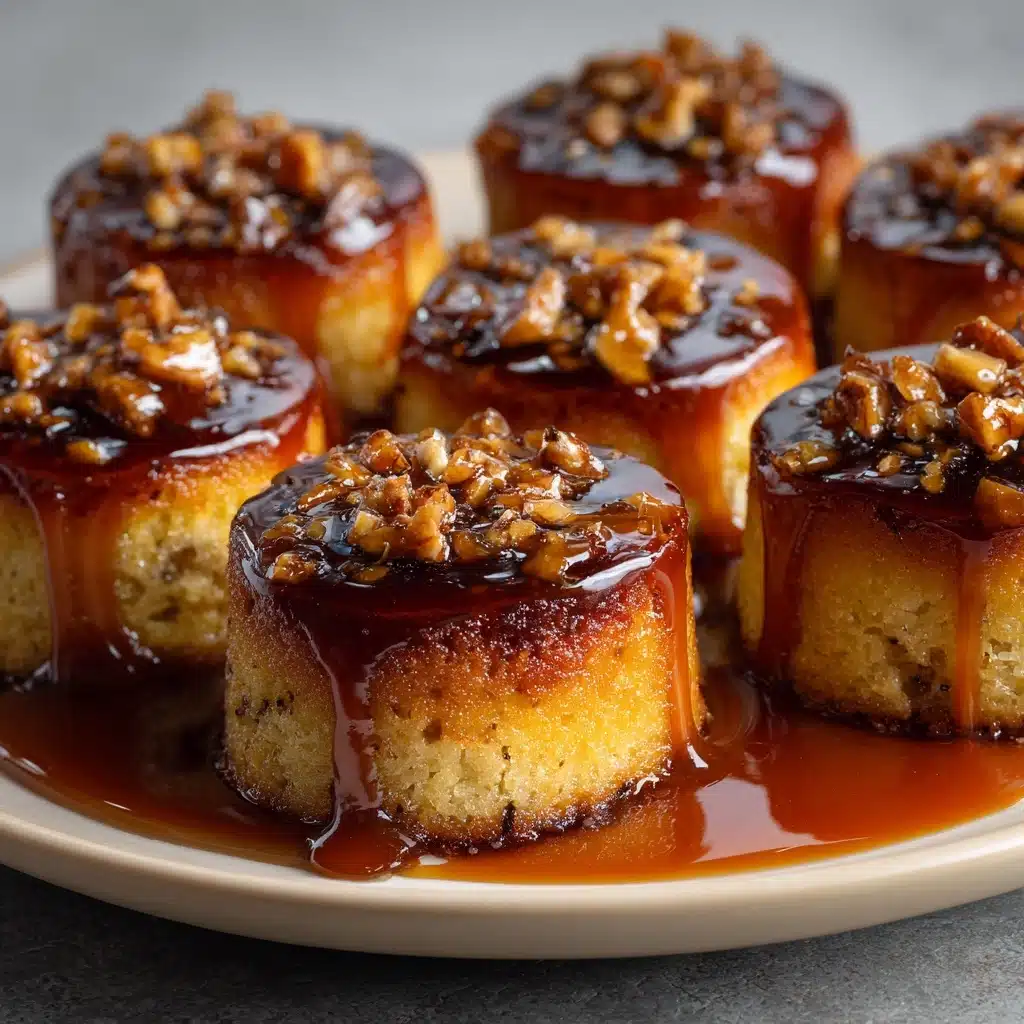
If there’s one breakfast pastry I could happily wake up to on any morning, it’s these No-Fuss Sticky Buns. Imagine pillowy soft biscuits, all snuggled up in a gooey, buttery caramel sauce studded with pecans or walnuts — and you didn’t even need to break out the mixer! This recipe brings pure cinnamon-swirled joy, minus all the fuss, and is destined to become your new shortcut for a warm, bakery-worthy treat. Whether you serve them at a family brunch or as an anytime sweet, these sticky buns always deliver that irresistible combination of cozy aroma, crackly nuts, and melt-in-your-mouth warmth. Trust me, your kitchen is about to smell like pure happiness.
Ingredients You’ll Need
You won’t believe how this collection of kitchen staples comes together to create magic. Each ingredient has its special place in making these buns soft, sticky, spiced, and sweet. With just a handful of essentials and a shortcut biscuit dough, you’re minutes from seriously good No-Fuss Sticky Buns.
- Refrigerated biscuit dough (16-ounce package): The ultimate shortcut for fluffy buns without the need for yeast or rising time; it gives these buns a tender texture in a snap.
- Unsalted butter (1/2 cup, melted): Rich, luxurious flavor and the base of that luscious caramel sauce.
- Brown sugar (3/4 cup, packed): The backbone of sticky bun sweetness, melts with butter to make a decadent, molasses-y glaze.
- Granulated sugar (1/4 cup): Adds sweetness and helps give the cinnamon coating a tiny crunch.
- Honey (2 tablespoons): Gives depth, gloss, and a subtle floral note to the caramel sauce.
- Water (1 tablespoon): Helps the caramel topping stay smooth and pourable.
- Ground cinnamon (1 teaspoon): Essential for that warm spiced aroma and cozy flavor throughout every bite.
- Vanilla extract (1/2 teaspoon): Rounds out all the sweetness with classic vanilla warmth.
- Chopped pecans or walnuts (1/2 cup): Adds irresistible crunch and nutty flavor to the sticky topping; your choice based on what you love.
How to Make No-Fuss Sticky Buns
Step 1: Prep the Pan and Heat the Oven
Start by preheating your oven to 350°F (175°C) — this way it’ll be perfectly hot when you’re ready. Grease a 9×13-inch baking dish or, for cute individual servings, a standard muffin tin. A little butter or nonstick spray ensures that epic sticky topping comes out easily when you flip the buns post-bake.
Step 2: Make the Caramel Nut Base
Grab a small saucepan and combine your melted butter, brown sugar, honey, water, and that splash of vanilla extract. Set it over medium heat, stirring often, until the sugar melts and everything melds together into a shiny, amber sauce — this usually takes about 2–3 minutes. Pour the caramel straight into the greased pan and sprinkle the chopped nuts evenly across the top. This will become the ooey-gooey crown once the buns are inverted.
Step 3: Coat Biscuits in Cinnamon Sugar
In a separate little bowl, mix together the granulated sugar and cinnamon. Pop open your refrigerated biscuit dough and separate the rounds. One by one, gently roll each biscuit in the cinnamon sugar, pressing lightly to coat all sides. This simple step boosts every bite with sweet, spicy flavor.
Step 4: Arrange and Bake
Place the coated biscuits snugly over the nutty caramel layer in your prepared pan. It’s fine if they touch — that just means extra gooey, pull-apart edges once baked! Slide the pan into your preheated oven and bake for 25–30 minutes, until the tops are golden and the caramel is bubbling around the sides. Your kitchen will smell like a dream.
Step 5: Flip and Serve
Let the buns cool for about 5 minutes (not too long, or the caramel will stick!). Then, with oven mitts and a bit of courage, invert the whole pan onto a big serving platter. Don’t worry — sticky buns are meant to be a little messy. The caramel nut topping will flow beautifully over the warm buns. Serve them immediately while the glaze is still glossy and irresistible.
How to Serve No-Fuss Sticky Buns
Garnishes
Though these No-Fuss Sticky Buns are a showstopper just as they are, you can jazz them up by scattering a few extra toasted nuts or even a dusting of powdered sugar right before serving. A little drizzle of extra honey or a handful of fresh berries adds a pop of color and freshness. Don’t be afraid to get creative and make them your own!
Side Dishes
Pairing No-Fuss Sticky Buns with something savory balances out the sweetness. Try serving them alongside a fluffy veggie omelet, a platter of crisp bacon, or a bowl of fresh fruit salad. For brunch guests, hot coffee or strong tea makes these buns taste even better. Serve everything family-style and let everyone dig in.
Creative Ways to Present
If you’re serving these at a gathering, arrange the sticky buns in a swirl on a big round platter or set each in a cupcake liner for little grab-and-go treats. For a cute holiday breakfast, stack them like a “sticky bun tower” and sprinkle extra nuts between layers. And if you want to go full dessert mode, top each warm bun with a scoop of vanilla ice cream.
Make Ahead and Storage
Storing Leftovers
While No-Fuss Sticky Buns truly shine fresh from the oven, you can keep leftovers just as wonderful. Place any uneaten buns in an airtight container and store at room temperature for up to two days. If your kitchen is warm or humid, keep them in the fridge for longer freshness.
Freezing
If you want to keep these sticky buns on hand for future cravings, you’re in luck. Simply wrap each bun tightly in plastic wrap and store them together in a freezer-safe bag or container for up to two months. Thaw overnight in the fridge or at room temperature for a few hours before reheating.
Reheating
To bring No-Fuss Sticky Buns back to their soft, gooey best, warm them in a 300°F (150°C) oven for about 10 minutes or until heated through. You can also microwave individual buns for 20–30 seconds. Add a tiny splash of water to the container before reheating to keep everything extra moist.
FAQs
Can I make No-Fuss Sticky Buns with homemade biscuit dough?
Absolutely! If you love making biscuits from scratch, feel free to substitute your favorite recipe. Just use enough dough to yield 12 biscuits, and follow the same coating, baking, and flipping method. The shortcut dough keeps things simple, but homemade always works.
What nuts work best for the sticky topping?
Pecans and walnuts are both classic choices, bringing rich, buttery crunch. You could also try chopped almonds for a twist, or even skip the nuts if you prefer a smooth caramel finish. Just be sure to toast your nuts first for extra deep flavor!
Can I prepare No-Fuss Sticky Buns the night before?
Yes, you can assemble the caramel layer and coat the biscuits the night before. Cover the pan tightly and refrigerate. When ready to bake, let it sit at room temperature for 20–30 minutes while your oven preheats, then bake as directed. Fresh, warm sticky buns will be ready in no time.
Are these sticky buns freezer-friendly after baking?
Definitely! Freeze fully baked, cooled buns as mentioned above. When you’re ready for a sticky bun fix, thaw and reheat gently. They’ll taste nearly as good as the day you baked them.
What’s the best way to invert the sticky buns for serving?
Place a rimmed baking sheet or large platter over your pan, grip both firmly (with oven mitts if hot!), and quickly flip them over. If any caramel or nuts stick to the pan, just scoop them out and spread them back on top — that’s part of the easygoing No-Fuss Sticky Buns spirit.
Final Thoughts
If you’re craving the comforting flavors of a bakery breakfast with none of the hassle, you’ll love these No-Fuss Sticky Buns. The shortcut dough, rich caramel, and crunchy nuts are a match made in heaven, and the whole process is irresistibly simple. Give them a try — I promise, your home (and your breakfast table) will thank you!
Print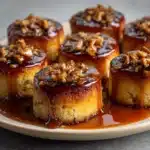
No-Fuss Sticky Buns Recipe
- Total Time: 40 minutes
- Yield: 12 sticky buns 1x
- Diet: Vegetarian
Description
Indulge in these no-fuss sticky buns that are a perfect blend of sweet caramel, warm spices, and crunchy nuts. Easy to make with refrigerated biscuit dough, they are a delightful treat for breakfast or dessert.
Ingredients
Dough:
- 1 (16-ounce) package refrigerated biscuit dough
Topping:
- 1/2 cup unsalted butter, melted
- 3/4 cup brown sugar, packed
- 2 tablespoons honey
- 1 tablespoon water
- 1/2 teaspoon vanilla extract
- 1/2 cup chopped pecans or walnuts
Cinnamon Sugar Coating:
- 1/4 cup granulated sugar
- 1 teaspoon ground cinnamon
Instructions
- Preheat the oven: Preheat the oven to 350°F (175°C) and grease a 9×13-inch baking dish or muffin tin.
- Prepare the caramel: In a saucepan, combine butter, brown sugar, honey, water, and vanilla. Cook until smooth.
- Layer the nuts: Pour the caramel mixture into the pan and sprinkle with chopped nuts.
- Coat the dough: Mix granulated sugar and cinnamon. Roll each biscuit in the mixture.
- Arrange and bake: Place coated biscuits over the nuts, bake for 25–30 minutes until golden and bubbly.
- Serve: Cool for 5 minutes, then invert onto a platter with the topping facing up. Serve warm.
Notes
- Enhance flavor with a pinch of nutmeg in the cinnamon sugar mix.
- Best served fresh; can be reheated in the oven for 10 minutes the next day.
- Prep Time: 10 minutes
- Cook Time: 30 minutes
- Category: Breakfast, Dessert
- Method: Baking
- Cuisine: American
Nutrition
- Serving Size: 1 bun
- Calories: 270
- Sugar: 21 g
- Sodium: 390 mg
- Fat: 14 g
- Saturated Fat: 6 g
- Unsaturated Fat: 7 g
- Trans Fat: 0 g
- Carbohydrates: 34 g
- Fiber: 1 g
- Protein: 3 g
- Cholesterol: 20 mg