Chewy Homemade Granola Bars Recipe
If you’re on the hunt for an irresistibly chewy snack that bursts with homey comfort and customizable flavor, these Chewy Homemade Granola Bars are about to become your new go-to recipe! Combining pantry staples like rolled oats, crispy rice cereal, honey, and just the right touch of chocolate, these bars are soft, sweet, and infinitely snackable. Whether you’re packing them for a hike, lunchbox, or afternoon pick-me-up, their playful texture and wholesome ingredients guarantee they’ll disappear fast. The best part? They come together in a flash—no baking required! Get ready to fall in love with a chewy treat that feels as good as it tastes.
Ingredients You’ll Need
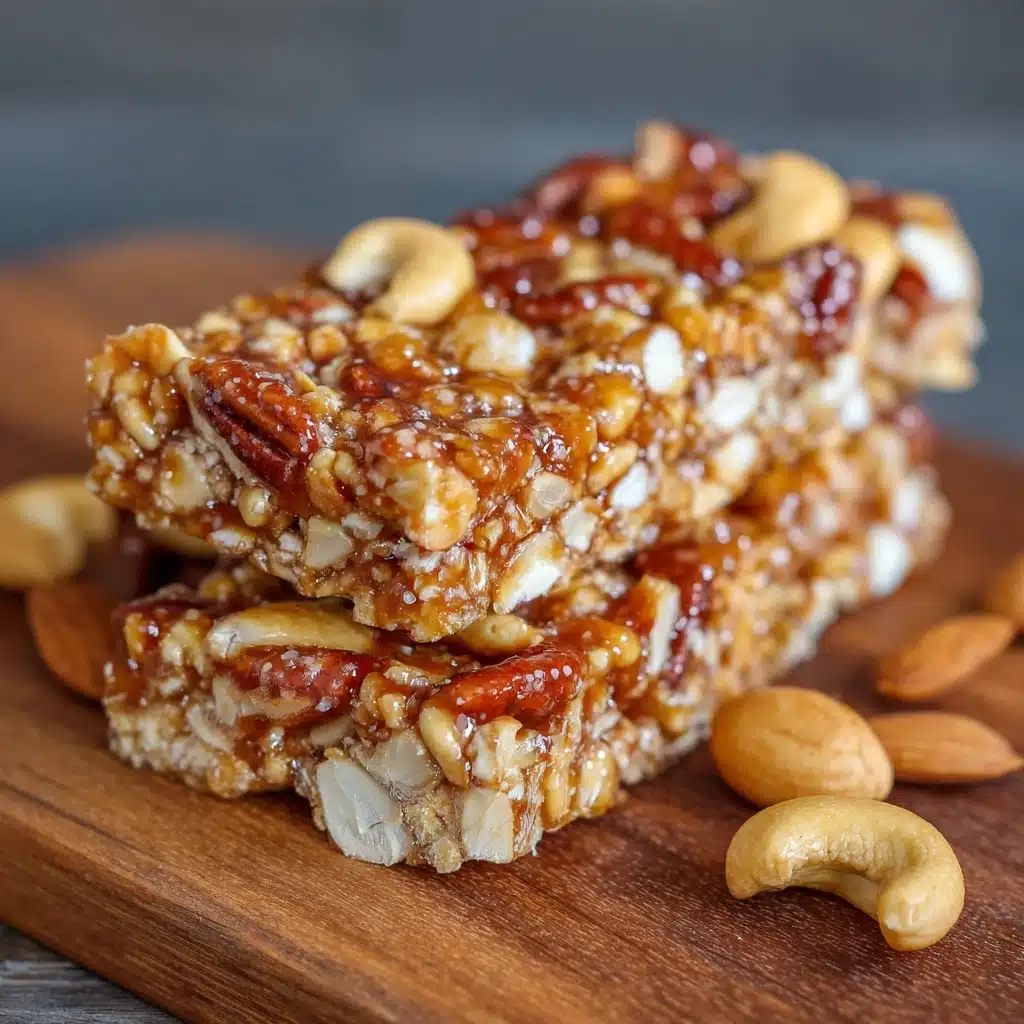
Ingredients You’ll Need
Making Chewy Homemade Granola Bars is surprisingly simple—each ingredient shines with a purpose, delivering chewy texture, sweetness, and a little crunch. Here’s a look at what you’ll need, plus a few tips to make every bite just right.
- Old-fashioned rolled oats: These provide the hearty, satisfying chew at the heart of every great granola bar.
- Crispy rice cereal: For lightness and crunch, cereal helps keep the bars delightfully soft instead of dense.
- Honey or maple syrup: This is the natural glue that binds everything together, adding gentle sweetness and that signature chew.
- Brown sugar (packed): For caramel depth and a little extra stickiness—you can slightly reduce the amount for a less sweet bar.
- Unsalted butter: Adds richness, helps bind, and brings a subtle flavor that ties everything together.
- Vanilla extract: Enhances the flavors with a cozy, aromatic warmth—don’t skip it!
- Salt: A little pinch balances the sweetness and brings out every flavor note.
- Mini chocolate chips: For melty pockets of chocolate with every bite; mini chips distribute best throughout the bars.
- Chopped nuts or seeds (optional): Boosts crunch and provides extra nutrition—almonds, walnuts, pumpkin seeds, or sunflower seeds all work well.
- Dried fruit (optional): Chewy bits of dried cranberries, cherries, or raisins add color, tang, and a fruity surprise.
How to Make Chewy Homemade Granola Bars
Step 1: Prep the Pan
Grab an 8×8-inch baking dish and line it with parchment paper, making sure to leave a little paper hanging over the sides. Those flaps make it a breeze to lift the bars out once they’re set—no sticky mess required!
Step 2: Mix the Dry Ingredients
In a large mixing bowl, stir together the rolled oats and crispy rice cereal. This early mix ensures every bite has the perfect balance of chewy and crisp—plus, it makes blending in the syrup super smooth and even later on.
Step 3: Make the Sweet Syrup
In a small saucepan over medium heat, combine your honey (or maple syrup), packed brown sugar, and unsalted butter. Stir constantly as the mixture melts together, then let it come to a gentle boil for precisely one minute. This step is crucial for achieving that lovable chewy texture—don’t walk away here! Remove the pan from the heat and quickly stir in the vanilla extract and salt.
Step 4: Combine and Coat
Immediately pour the hot syrup over the oat and cereal mixture. Working quickly—but carefully!—stir until everything is evenly coated. The goal is to ensure the syrup sticks to every little cluster so your bars hold together after chilling.
Step 5: Add Goodies
Let the mixture cool for about 5 minutes—just enough so your chocolate chips don’t melt completely. Fold in the mini chocolate chips, and if you like, toss in those chopped nuts or dried fruit for added flavor and texture. Every batch can be a little different, depending on what you love most!
Step 6: Press and Chill
Spoon the mixture into your prepared baking dish, pressing it down firmly with a spatula, the back of a spoon, or a piece of parchment paper. Compacting here is key for extra chewy, sliceable bars. Pop the pan into the fridge for 1–2 hours to set up until firm, then use the parchment handles to lift out and slice into tidy bars.
How to Serve Chewy Homemade Granola Bars
Garnishes
A little extra sprinkle goes a long way with Chewy Homemade Granola Bars. Try dusting the tops with a handful of mini chocolate chips, a drizzle of melted dark chocolate, or even a pinch of flaky sea salt for a bakery-style finish. If you’re feeling fancy, a sprinkle of shredded coconut instantly makes them look and taste extra special.
Side Dishes
While Chewy Homemade Granola Bars easily stand alone as a star snack, they play beautifully alongside a dollop of Greek yogurt, a handful of fresh fruit, or a tall glass of cold milk. For a wholesome breakfast, pair them with a smoothie or warm cup of coffee and enjoy a complete morning treat.
Creative Ways to Present
Slice the bars into fingers and wrap them individually in parchment for easy grab-and-go snacks. Stack and tie with baker’s twine for an edible gift, or cut them into mini squares for a party platter that’s perfect for sharing. You can even pop a bar into lunchboxes—kids and adults alike will grin with every bite.
Make Ahead and Storage
Storing Leftovers
Once you’ve made your Chewy Homemade Granola Bars, store any leftovers in an airtight container at room temperature for up to 5 days—they stay soft, chewy, and just as delicious as the day you made them. If you want a firmer texture, the fridge is your friend: chilling prolongs freshness and helps the bars hold their shape even better.
Freezing
Got a big batch? No worries—these bars freeze like a dream. Layer them between sheets of parchment in a freezer-safe container, then freeze for up to 3 months. When snack cravings strike, just thaw a bar at room temperature for a lunchtime treat or after-school pick-me-up.
Reheating
If you prefer your Chewy Homemade Granola Bars warm (who can resist a slightly melty chocolate chip?), zap one in the microwave for just 8–10 seconds. This brings back that just-made freshness and makes the chocolate delightfully gooey—perfect for pairing with a cold glass of milk.
FAQs
Can I make Chewy Homemade Granola Bars vegan?
Absolutely! Just swap the butter for a plant-based alternative like coconut oil or vegan butter, and use maple syrup instead of honey. Make sure to check your chocolate chips are dairy-free as well.
How do I keep the bars from falling apart?
The key is to firmly press the mixture into the pan and give it enough time to set in the refrigerator. Also, be sure to let the syrup boil for the full minute so it thickens and binds everything together.
What add-ins go best with Chewy Homemade Granola Bars?
Mini chocolate chips, chopped nuts (like almonds or walnuts), and dried fruits (such as cranberries or apricots) are fan favorites. Feel free to mix and match according to your cravings—just keep the add-ins to about 1 cup total so the bars hold together well.
Can I double the recipe?
Yes, it’s easy to double! Use a 9×13-inch pan and follow the same instructions. Just make sure to keep an eye on the syrup as you may need a slightly bigger saucepan.
Do Chewy Homemade Granola Bars need to be refrigerated?
While they don’t require refrigeration and can stay fresh at room temperature, chilling them helps the bars stay firmer and last longer—perfect for make-ahead snacking!
Final Thoughts
There’s nothing more satisfying than creating a batch of Chewy Homemade Granola Bars that’s perfectly tailored to your tastebuds. They’re easy, rewarding, and destined to be a lunchbox staple or a comfort snack any day of the week. Give them a try—you might just find yourself making them on repeat!
Print
Chewy Homemade Granola Bars Recipe
- Total Time: 2 hours 15 minutes
- Yield: 12 bars 1x
- Diet: Vegetarian
Description
Make your own Chewy Homemade Granola Bars with this easy recipe. These bars are perfect for a quick snack or breakfast on the go, packed with oats, crispy rice cereal, and sweetened with honey and chocolate chips.
Ingredients
Main Ingredients:
- 2 1/2 cups old-fashioned rolled oats
- 1 cup crispy rice cereal
- 1/2 cup honey or maple syrup
- 1/4 cup brown sugar (packed)
- 1/4 cup unsalted butter
- 1/2 teaspoon vanilla extract
- 1/4 teaspoon salt
Optional Add-Ins:
- 1/2 cup mini chocolate chips
- 1/2 cup chopped nuts or seeds
- 1/4 cup dried fruit
Instructions
- Prepare the Pan: Line an 8×8-inch baking dish with parchment paper.
- Mix Dry Ingredients: Combine rolled oats and crispy rice cereal in a large bowl.
- Make Syrup Mixture: In a saucepan, heat honey, brown sugar, and butter until boiling. Stir in vanilla and salt.
- Combine Mixtures: Pour the syrup over the oats and mix well. Add optional ingredients.
- Chill and Cut: Press mixture into the pan, chill until firm, then cut into bars.
Notes
- Avoid overboiling the syrup for chewier bars.
- Store in an airtight container; stays fresh up to 5 days at room temp or longer in the fridge.
- Prep Time: 10 minutes
- Cook Time: 5 minutes
- Category: Snack
- Method: No-Bake
- Cuisine: American
Nutrition
- Serving Size: 1 bar
- Calories: 210
- Sugar: 12g
- Sodium: 60mg
- Fat: 9g
- Saturated Fat: 4g
- Unsaturated Fat: 4g
- Trans Fat: 0g
- Carbohydrates: 30g
- Fiber: 2g
- Protein: 3g
- Cholesterol: 10mg
