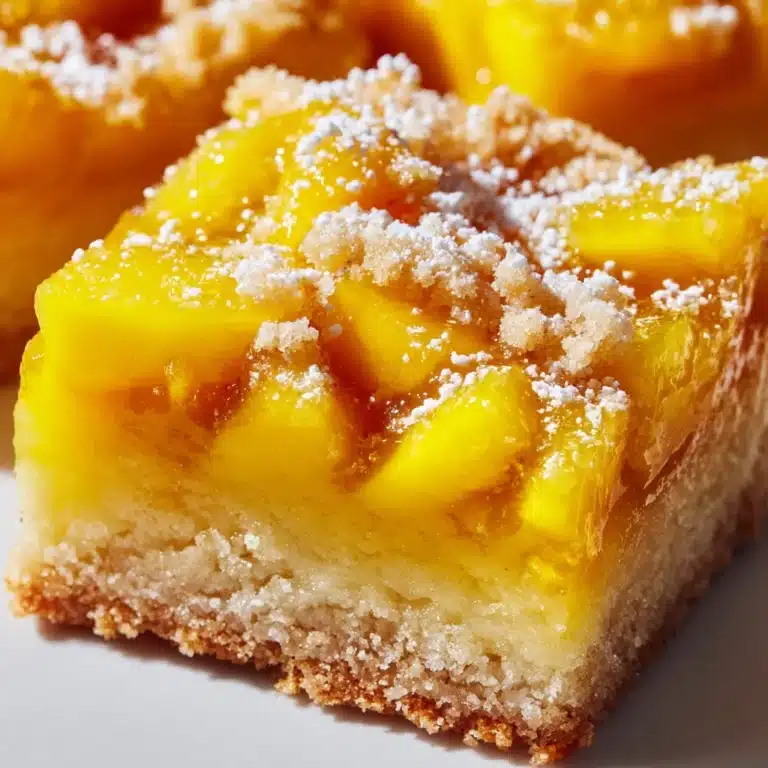
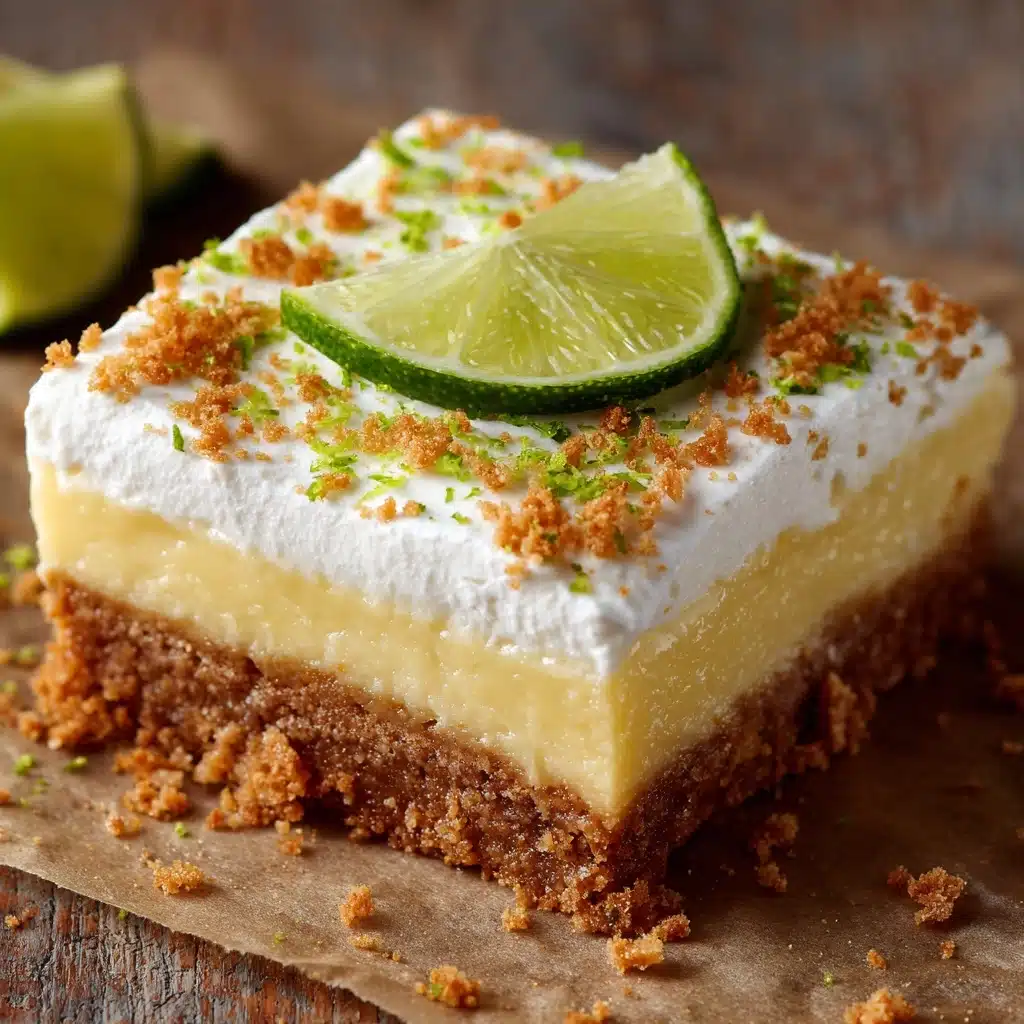
Easy Key Lime Pie Bars Recipe
If you’re craving a tangy, refreshing treat that brings all the best parts of pie to your fingertips, you’re in for a real delight with these Easy Key Lime Pie Bars. Imagine a layer of crisp, buttery graham cracker crust under a luscious, zesty lime filling, all topped with a cloud of whipped cream and extra lime zest. These bars deliver the tropical sunshine of key lime pie, but in portable, convenient squares — they’re perfect for backyard parties, picnics, or when you just need a little slice of summer. Whether you’re a longtime fan of citrusy desserts or new to lime, this recipe is about to become a go-to favorite in your kitchen.
Ingredients You’ll Need
One of the best things about Easy Key Lime Pie Bars is how each ingredient plays a crucial role in the magic. Simple, familiar components come together to create a creamy, tart, sweet treat with vibrant color and just the right amount of crunch.
- Graham cracker crumbs: The classic crust that adds crunch and a golden flavor base for the bars.
- Granulated sugar: Sweetens the crust just enough and helps everything stick together.
- Unsalted butter, melted: Binds the graham cracker and sugar mix and gives the crust its rich, buttery taste.
- Sweetened condensed milk: The key to that luscious, creamy texture and a must for authentic key lime pie flavor.
- Key lime juice (fresh or bottled): Provides that unmistakable, mouth-watering tang these bars are famous for.
- Lime zest: Adds a fresh, aromatic punch and an extra boost of citrus flavor.
- Egg yolks: Responsible for setting the filling, giving it a rich, smooth body.
- Heavy whipping cream (optional): Whips up into a fluffy topping that balances the tartness perfectly.
- Powdered sugar: Sweetens the whipped cream for that soft, melt-in-your-mouth topping.
- Vanilla extract: Provides a subtle warmth to the whipped cream, rounding out all the flavors.
- Extra lime zest (for garnish): Brightens up the finished bars with color and a hint of extra zestiness.
How to Make Easy Key Lime Pie Bars
Step 1: Prepare the Crust
Start by firing up your oven to 350°F so it’s nice and hot when you’re ready to bake. In a medium bowl, combine the graham cracker crumbs, granulated sugar, and melted butter. Use a fork (or your clean hands—no judgment!) to mix until the crumbs are evenly moist and the mixture clumps together. Press the mixture firmly into the bottom of a greased 9×13-inch baking dish, making an even, tight layer. This is the foundation of your bars, so don’t be shy about pressing it down firmly. Bake for 8 minutes to set the crust, then let it cool slightly while you prepare the filling.
Step 2: Mix Up The Filling
In a large bowl, whisk together the sweetened condensed milk, key lime juice, lime zest, and egg yolks. Go for a gentle but thorough mix—whisk until the filling is completely smooth and creamy. The combination of egg yolks and citrus juice will work its magic in the oven, creating a custardy base that has both tang and silkiness. Pour this mixture evenly over your warm crust, spreading it out to the corners for a perfectly even layer.
Step 3: Bake to Perfection
Pop your dish back into the oven and bake for about 15 to 18 minutes, or until the filling is just set and has a slight jiggle in the very center. This little wiggle is your friend—it means the bars will be creamy yet sliceable after chilling. Take them out and let them cool completely at room temperature. Once cooled, transfer to the refrigerator and chill for at least 3 hours. This chill time firms everything up and makes slicing a breeze.
Step 4: Whip Up The Topping (Optional)
If you love a creamy contrast to the citrus, make the whipped topping while the bars are chilling. In a cold mixing bowl, combine heavy whipping cream, powdered sugar, and vanilla extract. Beat with a hand mixer or whisk until soft peaks form and the mixture is light and billowy. You can spread this over the chilled bars or pipe it on for an elegant look—either way, it’s the perfect finishing touch.
Step 5: Garnish and Slice
Right before serving, sprinkle extra lime zest over the whipped cream. This not only amps up the flavor but gives your bars a pop of vibrant green that hints at the tartness inside. Slice into 16 bars—don’t worry if they’re a little rustic! Each one will deliver all the tangy, creamy goodness you’ve been craving from Easy Key Lime Pie Bars.
How to Serve Easy Key Lime Pie Bars

Garnishes
A generous sprinkle of fresh lime zest is the easiest way to finish these Easy Key Lime Pie Bars. You can also get playful with thinly sliced lime wheels, a twist of candied lime peel, or even a light dusting of crushed graham cracker for a little extra crunch. The whipped cream on top adds cloud-like softness and balances out the lively citrus notes, making every bite heavenly.
Side Dishes
These bars shine brightest with crisp, fresh accompaniments. Try pairing them with a bowl of mixed berries or a cool fruit salad—both compliment the tart lime beautifully without overpowering it. For something decadent, serve alongside coconut macaroons or toasted almonds for a touch of tropical flair. Even a scoop of vanilla bean ice cream is a lovely match!
Creative Ways to Present
When it comes to presentation, there are tons of ways to make your Easy Key Lime Pie Bars the centerpiece of any dessert table. Arrange them on a vintage cake stand for a party-ready display, or nestle them in parchment cupcake liners for easy, grab-and-go treats. Want to impress? Pipe a swirl of whipped cream on each bar and crown with a tiny edible flower or a sprinkle of lime zest—it’s simple, pretty, and sure to make your guests smile.
Make Ahead and Storage
Storing Leftovers
If you happen to have any bars left (which, let’s be honest, is a rare occurrence!), store them in an airtight container in the refrigerator. They’ll stay fresh and fabulous for up to 4 days, and are just as tasty—if not more so—after a night in the fridge as when freshly made.
Freezing
Yes, you can freeze Easy Key Lime Pie Bars! For best results, either wrap individual bars tightly in plastic wrap or layer them in a container with parchment between each layer. They’ll keep their texture and flavor for up to 1 month. To serve, just thaw them overnight in the refrigerator—no need to bake or rework anything.
Reheating
These bars are meant to be enjoyed cold or at room temperature, so reheating isn’t necessary. Simply let refrigerated bars sit out for a few minutes to take the chill off before serving, and they’ll be the perfect creamy texture.
FAQs
Can I use regular limes instead of key limes?
Absolutely! While true key limes have a unique flavor and fragrance, regular limes (like Persian limes) make a delicious substitute in Easy Key Lime Pie Bars. The bars will still have that tangy, delicious flavor you crave.
How do I know when the bars are fully baked?
Look for a gently set center that still jiggles just a bit when you gently shake the pan. The bars will finish firming up as they cool and chill in the refrigerator, so resist the urge to overbake.
Can I make these bars gluten-free?
Yes, you can easily swap in your favorite gluten-free graham crackers for the crust. The rest of the ingredients in Easy Key Lime Pie Bars are naturally gluten-free, so everyone can enjoy a slice!
Is it okay to make these bars a day ahead?
Making them a day ahead is actually ideal, as it gives the bars even more time to chill and the flavors to mingle. Just add the whipped cream topping and garnishes just before serving for best results.
What’s the best way to cut clean slices?
For crisp, tidy bars, use a sharp knife wiped clean between each cut. Chilling the bars thoroughly is key—cold bars slice much more neatly than those at room temperature.
Final Thoughts
If you’re ready to infuse your dessert lineup with freshness and fun, you won’t regret making these Easy Key Lime Pie Bars. They’re irresistible, foolproof, and bursting with bright citrusy flavor in every creamy bite. Whether for a summer party or a simple night in, it’s one recipe you’ll want to make again and again. Give them a try and let the sunshine in!
Print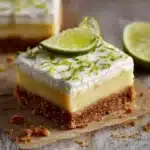
Easy Key Lime Pie Bars Recipe
- Total Time: 3 hours 40 minutes (including chilling)
- Yield: 16 bars 1x
- Diet: Non-Vegetarian
Description
These Easy Key Lime Pie Bars are a delightful twist on the classic dessert. With a buttery graham cracker crust, tangy key lime filling, and a luscious whipped cream topping, these bars are perfect for any occasion.
Ingredients
For the Crust:
- 1 1/2 cups graham cracker crumbs
- 1/3 cup granulated sugar
- 6 tablespoons unsalted butter, melted
For the Filling:
- 2 cans (14 ounces each) sweetened condensed milk
- 1 cup key lime juice (fresh or bottled)
- 2 teaspoons lime zest
- 4 large egg yolks
For the Topping (optional):
- 1 cup heavy whipping cream
- 2 tablespoons powdered sugar
- 1 teaspoon vanilla extract
- extra lime zest for garnish
Instructions
- Preheat oven: Preheat oven to 350°F.
- Prepare the crust: Combine graham cracker crumbs, sugar, and melted butter. Press into the bottom of a greased 9×13-inch baking dish and bake for 8 minutes.
- Make the filling: Whisk together sweetened condensed milk, key lime juice, lime zest, and egg yolks until smooth. Pour over crust and bake for 15–18 minutes.
- Cool and chill: Cool to room temperature, then refrigerate for at least 3 hours.
- Prepare the topping: Whip heavy cream, powdered sugar, and vanilla extract until soft peaks form. Spread over chilled bars and garnish with lime zest.
Notes
- For a more intense lime flavor, add an extra teaspoon of lime zest to the filling.
- Bars can be frozen for up to 1 month—thaw overnight in the refrigerator before serving.
- Prep Time: 15 minutes
- Cook Time: 25 minutes
- Category: Dessert
- Method: Baking
- Cuisine: American, Tropical
Nutrition
- Serving Size: 1 bar
- Calories: 280
- Sugar: 29g
- Sodium: 150mg
- Fat: 13g
- Saturated Fat: 8g
- Unsaturated Fat: 4g
- Trans Fat: 0g
- Carbohydrates: 38g
- Fiber: 0g
- Protein: 5g
- Cholesterol: 75mg