No-Bake Black Forest Berry Cheesecake Recipe
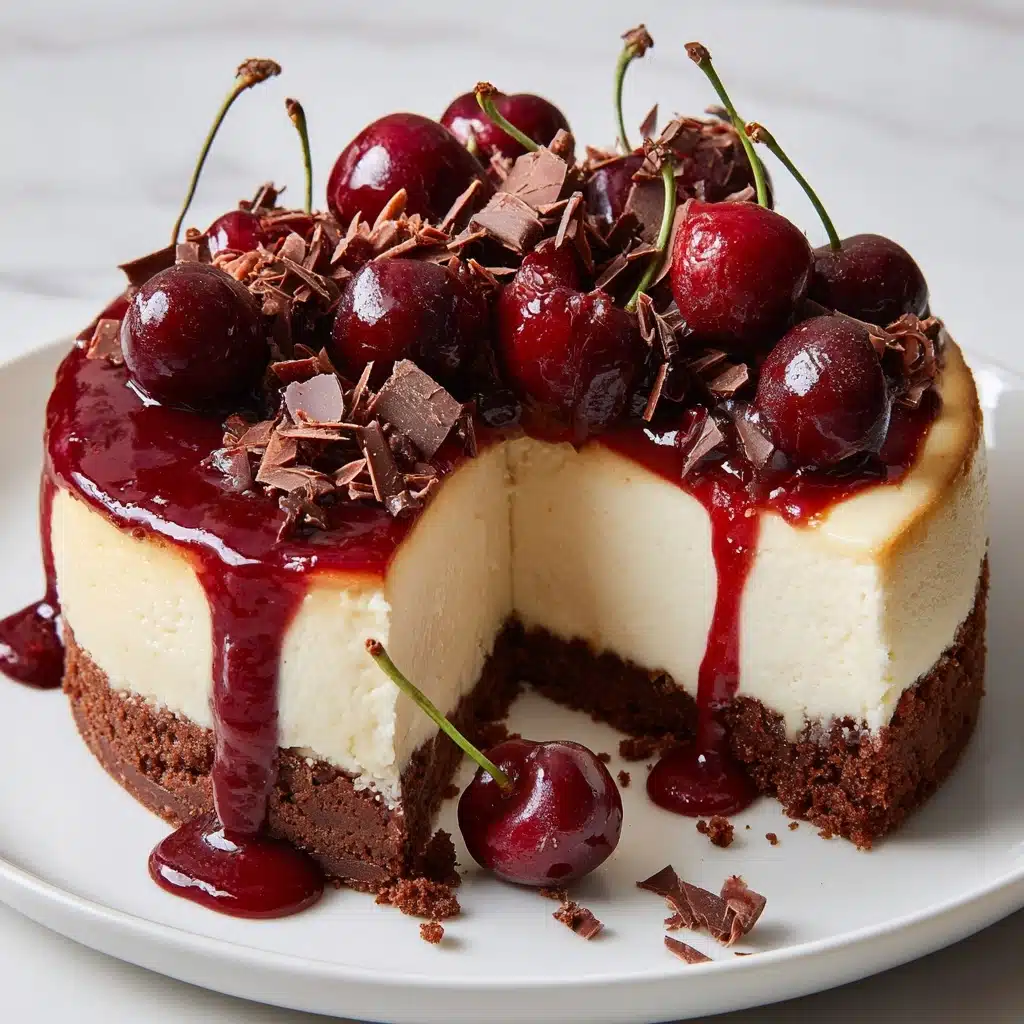
If you’re looking for a showstopping dessert that’s equal parts luscious, dreamy, and wonderfully easy to make, let me introduce you to the No-Bake Black Forest Berry Cheesecake. This gorgeous, berry-topped treat brings together the best of creamy cheesecake, fudgy chocolate cookie crust, and a bounty of juicy berries, all in one bite. It requires no oven, just a little patience while it chills, and yields a spectacular result with layers of decadent flavor and color. Whether you’re celebrating something special or just want an irresistible weeknight treat, this cheesecake is the kind of recipe that becomes a forever favorite.
Ingredients You’ll Need
Every component in this No-Bake Black Forest Berry Cheesecake plays a starring role, from the rich chocolate cookie crust to the creamy filling and jewel-toned berries on top. With just a handful of well-chosen ingredients, you can create a dessert that tastes (and looks) far more complicated than it really is.
- Chocolate cookie crumbs: Brings a deep, chocolatey base that pairs perfectly with berries and tangy cheesecake.
- Unsalted butter: Holds the crust together and adds richness without overpowering the other flavors.
- Cream cheese: Gives the filling its iconic tang and creamy texture—make sure it’s softened for the smoothest blend.
- Powdered sugar: Sweetens the filling without any gritty texture; it melts right into the cream cheese.
- Pure vanilla extract: Rounds out the flavors and adds a warm, inviting aroma.
- Heavy cream: When whipped, it lightens the filling and makes every bite airy and luscious.
- Cherry pie filling: Adds instant Black Forest flair with ruby-red color and sweet-tart flavor.
- Fresh mixed berries: For bursts of juiciness and a pop of naturally beautiful color on the finished cheesecake.
- Chocolate shavings (optional): A final flourish that takes your creation from delicious to dazzling.
How to Make No-Bake Black Forest Berry Cheesecake
Step 1: Create the Chocolate Crust
Start by mixing the chocolate cookie crumbs with melted butter in a medium bowl until every crumb is nicely coated and moist. Once it holds together when pinched, press the mixture evenly into the bottom of a 9-inch springform pan. Use the bottom of a glass or cup to pack it down firmly, forming an even, compact crust. Pop it in the fridge so it sets while you work on the dreamy filling.
Step 2: Make the Creamy Cheesecake Filling
In a large mixing bowl, beat the softened cream cheese with powdered sugar and vanilla extract until completely smooth and fluffy. This step is where the magic happens—creamy, sweet, and just a little tangy. In a separate bowl, whip the heavy cream to stiff peaks (don’t rush this step, as it will give your No-Bake Black Forest Berry Cheesecake a light, mousse-like texture). Very gently fold the whipped cream into the cream cheese mixture until no streaks remain.
Step 3: Assemble the Cheesecake Layers
Spread the luscious filling over the chilled chocolate crust, smoothing the top as you go. You want a pillowy, even layer—patience here pays off when you slice into the finished cake. Once your filling is in place, carefully spoon the cherry pie filling over the top, letting some of the bright cherry sauce cascade down the sides for extra effect.
Step 4: Add the Berry Topping
Now for the best part: scatter a generous handful of fresh mixed berries (think blackberries, blueberries, and raspberries) across the glossy cherry layer. Their tartness and juiciness balance the sweet, creamy filling, making every forkful irresistibly fresh.
Step 5: Chill Until Set
Let the entire No-Bake Black Forest Berry Cheesecake chill in the refrigerator for at least 4 hours, until it’s firm enough to slice cleanly. This waiting period lets all the flavors mingle and set to perfection. Don’t rush it—this patience is rewarded with cheesecake bliss!
Step 6: Garnish and Serve
Before serving, shower the top with chocolate shavings for a little extra drama and elegance. Then, slice, serve, and savor every chocolaty-berry-creamy bite.
How to Serve No-Bake Black Forest Berry Cheesecake

Garnishes
A flourish of chocolate shavings, a few extra berries, or even a dusting of powdered sugar turns every slice into a picture-perfect showpiece. You can also pipe on a swirl of unsweetened whipped cream for a true bakery touch—this cheesecake loves a little glam.
Side Dishes
Serve this indulgent dessert after a light main course, or pair each slice with a hot cup of espresso or a refreshing berry-infused iced tea. Seasonal fresh fruit or a crisp salad balances out the richness beautifully, making the No-Bake Black Forest Berry Cheesecake the perfect finale.
Creative Ways to Present
Serve in elegant slices from a classic springform pan for a centerpiece-worthy dessert, or try making mini cheesecakes in glass jars for picnics and parties—a fun, grab-and-go twist! You could even layer the components in parfait glasses for a stunning, deconstructed look.
Make Ahead and Storage
Storing Leftovers
Keep leftover No-Bake Black Forest Berry Cheesecake in the fridge, covered tightly with plastic wrap or in an airtight container. It stays wonderfully fresh for up to three days, and the flavors only get better as they mingle overnight.
Freezing
For longer storage, freeze individual slices or the entire cheesecake (minus the fresh berries and garnishes) wrapped well in plastic, then foil. Thaw it overnight in the refrigerator before topping with fresh berries and chocolate shavings.
Reheating
No reheating needed! This cheesecake is best served chilled straight from the fridge. If frozen, simply thaw until perfectly creamy before slicing and serving.
FAQs
Can I use frozen berries instead of fresh for the topping?
Absolutely! If you use frozen berries, just be sure to thaw and drain them well first, so they don’t make the top of your No-Bake Black Forest Berry Cheesecake watery. Fresh berries provide the prettiest finish, but frozen work when you’re in a pinch.
What’s the best way to get neat slices?
For picture-perfect slices, dip a sharp knife into hot water and wipe it clean between each cut. This extra step helps you slice cleanly through the creamy filling, juicy berries, and chocolate crust without dragging.
Can I make the No-Bake Black Forest Berry Cheesecake ahead of time?
Yes! In fact, this cheesecake is ideal for making a day ahead. Prepare as directed and chill overnight. Just remember to add fresh berries and chocolate shavings right before serving for best texture and appearance.
Is there a lighter version of this cheesecake?
For a lighter spin, swap half the cream cheese for Greek yogurt. You’ll still get a creamy filling with a subtle tang, while lightening up both calories and texture. It’s a fabulous way to personalize your No-Bake Black Forest Berry Cheesecake.
Can I use a different crust?
Totally! Graham crackers or even vanilla cookies can be substituted for the chocolate cookies, depending on the flavor you’re after. Just keep the ratio of crumbs to butter the same for perfect results.
Final Thoughts
If you love decadent, no-fuss desserts that genuinely wow, I can’t recommend the No-Bake Black Forest Berry Cheesecake enough. Give it a try—you might just find it becomes your go-to for every celebration, or simply when you crave a little sweet escape!
Print
No-Bake Black Forest Berry Cheesecake Recipe
- Total Time: 4 hours 20 minutes
- Yield: 12 servings 1x
- Diet: Vegetarian
Description
Indulge in the decadent flavors of a No-Bake Black Forest Berry Cheesecake. This luscious dessert features a rich chocolate cookie crust topped with a creamy cheesecake filling, cherry pie filling, fresh mixed berries, and optional chocolate shavings.
Ingredients
For the Crust:
- 1½ cups chocolate cookie crumbs
- 6 tablespoons unsalted butter, melted
For the Filling:
- 16 ounces cream cheese, softened
- 1 cup powdered sugar
- 1 teaspoon pure vanilla extract
- 1½ cups heavy cream, cold
For Topping:
- 1 cup cherry pie filling
- 1 cup fresh mixed berries (such as blackberries, blueberries, and raspberries)
- Chocolate shavings for garnish (optional)
Instructions
- Prepare the Crust: In a medium bowl, combine chocolate cookie crumbs and melted butter. Press into a 9-inch springform pan and refrigerate.
- Make the Filling: Beat cream cheese, powdered sugar, and vanilla until smooth. Whip cold heavy cream to stiff peaks, then fold into the cream cheese mixture. Spread over the chilled crust.
- Assemble the Cheesecake: Spoon cherry pie filling over the filling, then arrange fresh berries on top. Chill for at least 4 hours.
- Serve: Garnish with chocolate shavings before serving.
Notes
- For a lighter version, use a mix of Greek yogurt and cream cheese.
- Individual cheesecakes in jars are great for portion control.
- Whip cream well for a light and airy filling.
- Prep Time: 20 minutes
- Cook Time: 0 minutes
- Category: Dessert
- Method: No-Bake
- Cuisine: American, European-Inspired
Nutrition
- Serving Size: 1 slice
- Calories: 380
- Sugar: 25 g
- Sodium: 230 mg
- Fat: 27 g
- Saturated Fat: 16 g
- Unsaturated Fat: 11 g
- Trans Fat: 0 g
- Carbohydrates: 33 g
- Fiber: 2 g
- Protein: 5 g
- Cholesterol: 75 mg